
How to Make Neapolitan Pizza at Home?

Making authentic Neapolitan pizza at home is totally achievable with the right approach. You can create a delicious pizza with a soft, chewy crust and a slightly charred finish, just like the Neapolitan tradition demands. The key is understanding the dough and using high heat.
Neapolitan pizza is more than just a dish; it’s a protected culinary art form. Following its strict guidelines ensures you get that classic, irresistible flavor and texture. We’ve found that many home cooks struggle with achieving the right crust elasticity and oven temperature, but it’s simpler than you think.
TL;DR:
- Authentic Neapolitan pizza is possible at home.
- Focus on a proper dough recipe and high heat.
- The crust should be soft and chewy with some char.
- Understand the traditional Neapolitan pizza method.
Let’s walk through exactly how to make amazing Neapolitan pizza right in your own kitchen.
“`htmlCrafting Authentic Neapolitan Pizza Dough at Home
Making Neapolitan pizza at home is all about the dough. This isn’t just any pizza dough. It follows a specific recipe and technique to achieve that signature soft, airy, and slightly chewy crust. We’ve found that many home cooks overlook the importance of the right flour and hydration. Let’s get started with the building blocks of your perfect Neapolitan pie.
The Essential Ingredients for Your Dough
You only need a few high-quality ingredients for authentic Neapolitan pizza dough. Using the right kind of flour makes a big difference. You’ll want “00” flour. This is a finely milled Italian flour that’s perfect for high-temperature baking. It gives the crust a tender crumb.
The other key players are water, salt, and yeast. For Neapolitan pizza, simple is best. We’re aiming for a hydration level typically between 58% and 65%. This means the weight of the water is 58% to 65% of the weight of the flour. Don’t worry if that sounds technical; we’ll break down a simple recipe.
A Simple Neapolitan Dough Recipe
Here’s a solid starting point for your dough. This recipe makes about three to four 10-12 inch pizzas. You can easily scale it up or down.
What You’ll Need:
- 500 grams “00” flour
- 300-325 grams water (lukewarm, around 65-75°F)
- 10-15 grams fine sea salt
- 1-3 grams active dry yeast or instant yeast
Mixing the Dough: The First Step
First, dissolve your yeast in the lukewarm water. Let it sit for about 5 minutes until it looks a bit foamy. If it doesn’t foam, your yeast might be old, and you should get a new packet. Then, in a large bowl, combine the flour and salt.
Pour the yeast-water mixture into the flour. Start mixing with your hands or a spoon until a shaggy dough forms. It will look messy at first. That’s completely normal. Don’t overmix at this stage; we’re just bringing everything together.
Kneading for Elasticity
Turn the dough out onto a lightly floured surface. Now comes the kneading. You want to knead the dough for about 10-15 minutes. This develops the gluten, which is what gives your crust its structure and chewiness. You’re looking for a smooth, elastic dough that springs back when you gently poke it.
If you have a stand mixer, you can use the dough hook. Mix on low speed for about 8-10 minutes. Just be careful not to overwork it in the machine. We’re aiming for a supple dough, not a tough one.
The Magic of Fermentation: Bulk Ferment and Proofing
After kneading, the dough needs time to rest and develop flavor. This is where the magic happens. We call this fermentation or proofing. It’s crucial for that light, airy texture characteristic of Neapolitan pizza.
Bulk Fermentation (First Rise)
Place your kneaded dough in a lightly oiled bowl. Cover it tightly with plastic wrap or a damp cloth. Let it sit at room temperature for about 1-2 hours. During this time, the dough will increase in size, maybe double. This first rise is called the bulk ferment. We found that a slightly longer, cooler ferment can develop even more flavor.
Portioning and Balling
Once the dough has risen, gently turn it out onto your work surface. Divide it into equal portions. For a 10-12 inch pizza, each ball should be around 200-250 grams. Shape each portion into a smooth, tight ball. This is called “balling.” Tuck the seams underneath to create surface tension.
Second Proofing (Cold Fermentation)
Place the dough balls into individual lightly oiled containers or onto a lightly floured tray. Cover them well. Now, here’s a common recommendation from many pizza makers: put them in the refrigerator for at least 24 hours, and up to 48-72 hours. This cold fermentation slows down the yeast activity but allows the flavors to deepen beautifully. It also makes the dough much easier to handle and stretch.
When you’re ready to bake, take the dough balls out of the fridge about 2-3 hours before you plan to shape and bake them. Let them come to room temperature. They should look puffy and feel soft.
Achieving Neapolitan Pizza Perfection: Shaping and Topping
Now that you have your perfectly fermented dough, it’s time to shape it and add your toppings. The traditional Neapolitan method is very hands-off when it comes to shaping. We want to preserve as much air in the crust as possible.
Stretching the Dough by Hand
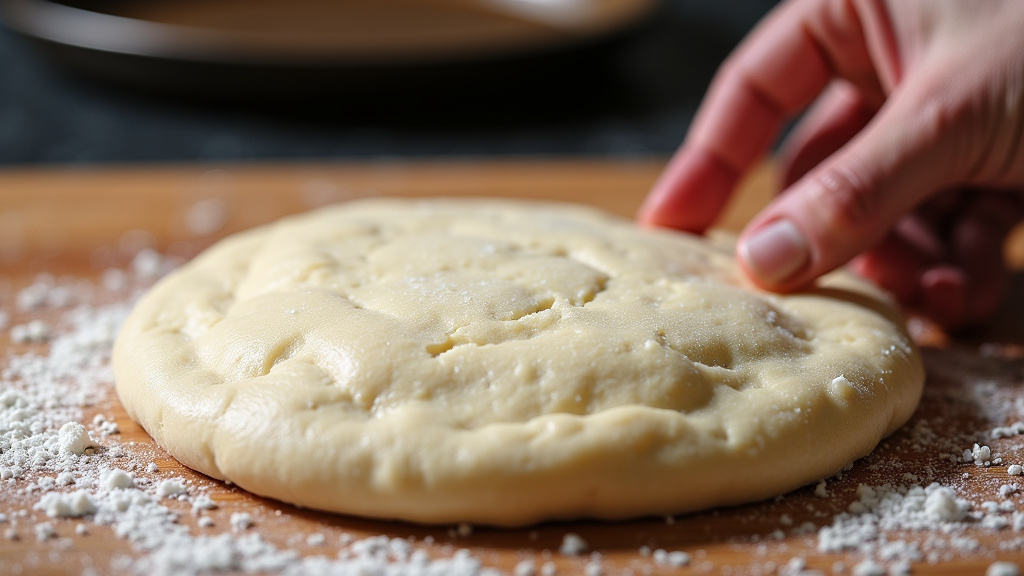
Take one dough ball and place it on a lightly floured surface. Start by gently pressing down in the center with your fingertips. Work your way outwards, leaving about a 1-inch border untouched. This border will become your cornicione, the puffy, charred edge.
Gently lift the dough and let gravity help you stretch it. You can also use the backs of your hands. Avoid using a rolling pin at all costs! A rolling pin will crush all those lovely air bubbles you worked so hard to create. We found that a gentle, consistent stretch is key. You’re aiming for a round shape, about 10-12 inches in diameter, with a thin center.
The Classic Margherita Toppings
Neapolitan pizza is all about fresh, high-quality ingredients. The most iconic is the Margherita. It represents the colors of the Italian flag.
Simple is Key:
- San Marzano Tomatoes: These are essential for the sauce. Crush them by hand or with a fork. Don’t cook the sauce; the raw tomato flavor is perfect.
- Fresh Mozzarella: Use fresh mozzarella (fior di latte or buffalo mozzarella). Tear it into pieces and scatter it over the sauce.
- Fresh Basil: A few fresh basil leaves added right before or after baking.
- Extra Virgin Olive Oil: A light drizzle over everything.
Don’t overload your pizza. Neapolitan pizza is not about piling on tons of toppings. The focus is on the dough and the quality of a few simple ingredients. Too many toppings can make the pizza soggy and difficult to cook properly.
The Importance of High Heat for Neapolitan Pizza
This is arguably the most critical part of making authentic Neapolitan pizza at home. Traditional Neapolitan pizzas are cooked in wood-fired ovens that reach scorching temperatures, often 800-900°F (425-480°C). This intense heat cooks the pizza in 60-90 seconds, creating that signature blistered crust.
Replicating High Heat in Your Home Oven
Achieving those temperatures in a standard home oven is challenging, but you can get close. The goal is to get your oven as hot as possible. We recommend preheating your oven to its highest setting, usually 500-550°F (260-290°C), for at least 45-60 minutes.
Your Baking Surface Matters: Pizza Stone or Steel
You absolutely need a pizza stone or pizza steel. These absorb and radiate heat, mimicking the floor of a wood-fired oven. Place your stone or steel on the top rack of your oven. Let it preheat with the oven for that full hour. A pizza steel transfers heat more efficiently than a stone, often leading to a crispier bottom crust.
Broiler Power for Charring
Once your oven and stone/steel are screaming hot, it’s time to bake. Many home cooks find success by turning on the broiler for the last minute or two of cooking. This intense top heat helps char the cornicione and cook the toppings quickly, giving you that Neapolitan look and taste. Just watch it carefully to avoid burning!
Baking Your Masterpiece
Carefully slide your stretched and topped pizza onto the preheated pizza stone or steel using a pizza peel dusted with semolina or flour. If you don’t have a peel, you can assemble the pizza on a piece of parchment paper and slide the parchment onto the hot surface. The parchment will help prevent sticking. A good pizza peel is crucial for safely transferring your creation to the hot surface.
Bake for 5-8 minutes. Keep an eye on it! You want the crust to puff up and get beautifully charred spots (leoparding). The cheese should be melted and bubbly. If using the broiler, activate it for the last 1-2 minutes, watching constantly.
Quick Checklist for Neapolitan Success:
- Use “00” flour for the dough.
- Ferment dough for at least 24 hours cold.
- Stretch dough by hand, avoid rolling pins.
- Use high-quality, simple toppings.
- Preheat your oven and stone/steel to maximum heat.
- Watch for that classic char and puff!
Transfer your cooked pizza to a cutting board. Let it rest for just a minute before slicing. Enjoy the fruits of your labor – a delicious, homemade Neapolitan pizza that rivals your favorite pizzeria!
“`Conclusion
You’ve learned how to create authentic Neapolitan pizza right in your kitchen! It all comes down to a few key elements: a well-fermented dough made with “00” flour, gentle hand-stretching, simple high-quality toppings, and most importantly, intense heat. Don’t be intimidated by the traditional methods; by following these steps, you can achieve that signature soft, chewy crust with beautiful char spots.
Your next step is to gather your ingredients and preheat your oven. Get ready to impress yourself and your loved ones with your homemade Neapolitan pizza!
Frequently Asked Questions
Can I make Neapolitan pizza dough without “00” flour?
While “00” flour is traditional, you can still make a delicious pizza with all-purpose flour or bread flour. You might find the crust is slightly different in texture, but it will still be great. Just aim for a good hydration level.
My pizza dough is too sticky. What did I do wrong?
A sticky dough often means it’s too hydrated for the amount of flour, or it wasn’t kneaded long enough. Try adding a tiny bit more flour during kneading, or let it rest for a few minutes to develop gluten. Cold fermentation also makes the dough easier to handle.
How can I get the char spots on my crust at home?
The char spots, or “leoparding,” come from the intense heat of a wood-fired oven. In your home oven, the best way to achieve this is by preheating your oven and pizza stone/steel to their absolute highest setting, and then using the broiler for the last minute or two of baking. Watch it very closely!
Why shouldn’t I use a rolling pin for Neapolitan pizza?
A rolling pin crushes the air bubbles that develop during fermentation. These air pockets are what create the light, airy, and puffy crust (the cornicione) that’s characteristic of Neapolitan pizza. Gentle hand-stretching preserves these bubbles.
How many times does Neapolitan pizza dough need to rise?
Neapolitan dough typically undergoes two main rising periods. The first is a bulk ferment at room temperature for 1-2 hours. The second is a longer, cold fermentation in the refrigerator for 24-72 hours, which develops flavor and texture. You let it come to room temp before shaping.
