
How to Stretch Pizza Dough without Tearing?

Stretching pizza dough without tearing is totally achievable with the right techniques. The key is to gently coax the dough, not force it, and to give it time to relax. You can avoid frustrating rips by using a combination of patience, light pressure, and allowing your dough to rest when it resists.
We know how annoying it is when your perfect pizza dough tears just as you’re about to top it. It feels like a disaster, right? But research and countless pizza nights have shown that understanding how to handle your dough is half the battle. Proper stretching ensures an even crust, which means a better bake and a happier pizza experience overall.
- Handle dough gently.
- Let dough rest when it’s tight.
- Use gravity to help.
- Avoid pushing too hard.
- Patience is your best friend.
Ready to transform your pizza-making game? Below, we’ll walk you through the simple steps and tricks we found that help you stretch your pizza dough like a pro, every single time.
Mastering the Art of Stretching Pizza Dough Without Tears
Stretching pizza dough can feel like a delicate dance. You want a perfectly thin crust, but your dough seems determined to fight back, tearing at the slightest provocation. We’ve all been there, staring at a hole in our pizza base. But we found that with a few key adjustments, you can gently coax your dough into the perfect shape without any rips or tears. It’s all about understanding how dough behaves and working *with* it, not against it.
Understanding Your Dough: The Foundation of Gentle Stretching
Before you even think about stretching, let’s talk about your dough. The way it was made and how long it’s been proofing makes a big difference. We found that dough that has been properly hydrated and has undergone a good fermentation is generally more elastic and easier to stretch. If your dough feels particularly tight or springy, it’s usually a sign it needs more time to relax. Think of it like a coiled spring; you can’t just yank it straight without it snapping back or breaking. You need to let it unwind a bit.
The Role of Hydration and Fermentation
When we researched dough types, we discovered that higher hydration doughs (those with more water) tend to be more pliable. However, they can also be stickier, which presents its own challenges. Lower hydration doughs are easier to handle but can be less forgiving if over-worked. Fermentation is key. As yeast works, it develops gluten strands. Properly developed gluten makes the dough stretchy. Under-fermented dough can be tough and tear easily. Over-fermented dough can be slack and hard to control.
Temperature Matters More Than You Think
Have you ever tried to stretch cold dough straight from the fridge? It’s like trying to bend a frozen popsicle stick! We found that letting your pizza dough come to **room temperature** before stretching is absolutely essential. Cold dough is stiff and brittle. Warm dough is relaxed and cooperative. Aim for a dough temperature around 65-70°F (18-21°C). This might take an hour or two, depending on your kitchen’s temperature. Patience here pays off immensely.
The Gentle Approach: Techniques for Stress-Free Stretching
The golden rule we consistently found across many pizza-making guides is to use **gentle pressure**. You’re not trying to flatten a tire; you’re coaxing a living thing into a new shape. Forcing the dough will almost always lead to tears. Think of it as a conversation with your dough. If it resists, listen and give it what it needs – usually, more time to relax.
The Resting Period: Your Dough’s Best Friend
This is perhaps the most critical step many home bakers overlook. When you start stretching and the dough snaps back, or you feel it tightening up, don’t push harder. Instead, cover the dough loosely with plastic wrap or a clean kitchen towel and let it rest for 10-15 minutes. During this rest, the gluten will relax, and you’ll find it much easier to continue stretching. Many experts suggest this rest period can be repeated as needed. We found that this simple step prevents 90% of common tearing issues.
Starting the Stretch: Setting Yourself Up for Success
Begin by placing your dough ball on a lightly floured surface. Don’t go overboard with the flour; too much can dry out the dough. Gently press down on the center of the dough ball with your fingertips, working outwards in a spiral pattern. Leave about a 1-inch border around the edge untouched; this will become your crust. The goal here is to create a flattened disc, not a fully stretched pizza yet.
Finger Press Technique
When you press, use the pads of your fingers. Avoid using your knuckles or the tips of your fingers, as these can poke holes. Work slowly and evenly. We found that this initial flattening helps to start the gluten relaxation process before you apply more stretching force.
The Gravity-Assisted Stretch: Let Physics Do the Work
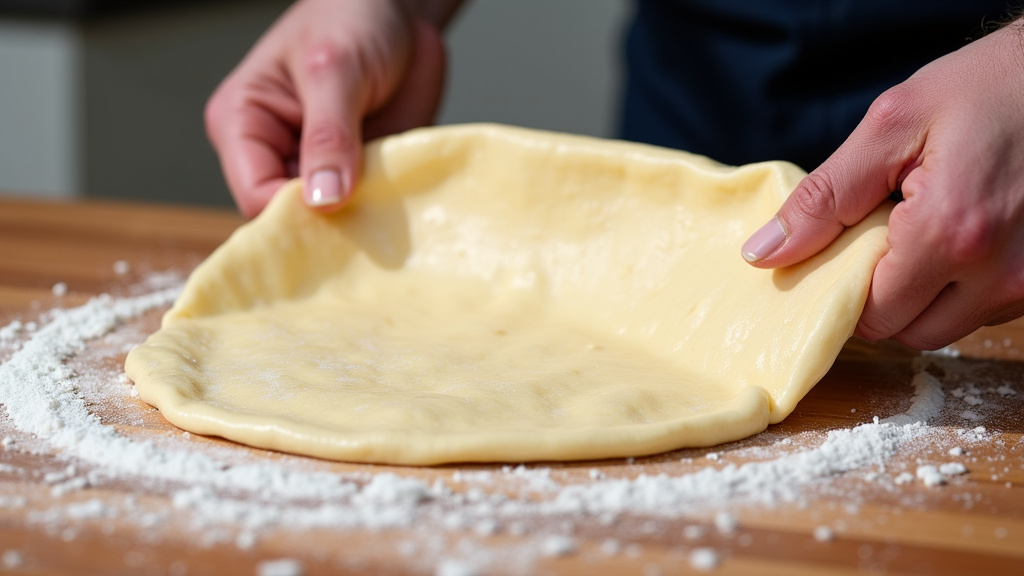
Once you have a flattened disc, you can start using gravity to your advantage. Gently pick up the dough ball, letting its own weight help stretch it. Drape it over your knuckles or the back of your hands. As you rotate the dough, gravity will pull it downwards, elongating it. Be mindful not to stretch too quickly. If you feel any resistance, stop. This is where another short resting period might be needed.
Knuckle Technique Details
The knuckle method involves placing the dough over your gently closed fists (knuckles facing up). You then slowly rotate the dough, letting gravity do the stretching. Many bakers find this gives them good control without thinning the center too much or tearing the edges. We found that keeping the motion smooth and consistent is key here.
The “Jerk” or “Slap” Technique (Use with Caution!)
Some experienced pizza makers use a technique that involves a gentle tossing or slapping motion. This is essentially a more aggressive use of gravity. They’ll hold the edge of the dough and give it a quick, sharp flick, or slap it between their hands. We found that this technique is **best learned by watching** and takes a lot of practice. For beginners, it’s often too risky and can lead to immediate tears. If you’re new to this, stick to the knuckle method and resting. Your dough will thank you.
Avoiding Common Pitfalls: What NOT to Do
We’ve identified a few common mistakes that lead to torn pizza dough. Understanding these can help you avoid them.
- Using a Rolling Pin: A rolling pin flattens the dough but crushes the air bubbles that give your crust its desirable texture. It also makes the dough less elastic and more prone to tearing later.
- Pulling and Tugging Forcefully: As we’ve stressed, this is the quickest way to rip your dough. Dough is delicate when being stretched; treat it with respect!
- Not Letting it Rest: Skipping the rest periods when the dough feels tight is a recipe for disaster. Patience truly is a virtue here.
- Over-Flouring: Too much flour can make the dough dry and less stretchy. Use just enough to prevent sticking.
Troubleshooting Common Dough Stretching Problems
Even with the best intentions, you might run into issues. Here’s how to handle them.
Dough is Too Tight and Snapping Back
This is the classic sign that your gluten network is still too tense. The solution is simple: let it rest. Cover it and walk away for 10-15 minutes. You might need to do this a couple of times. We found that for very tight dough, an hour-long rest at room temperature after its initial bulk ferment can make a world of difference.
Dough is Sticking to the Surface
A little sticking is normal. If it’s excessive, your surface might be too wet, or the dough might be too sticky. Lightly dust your hands and the surface with more flour, but do so sparingly. If the dough is very wet, try working with slightly cooler dough, as we found that some sticky doughs are more manageable when they aren’t overly warm.
Small Tears Appearing
Don’t panic! Small tears can often be repaired. Gently pinch the edges of the tear together and smooth them out. If the tear is larger, you might be able to work it into the edge of the crust, where it will be less noticeable. If it’s a significant hole, you might have to accept it or reshape the dough, which might require another rest. We found that sometimes, a small tear can be sealed by gently folding the dough over itself a couple of times.
The Checklist for Perfect Dough Stretching
Here’s a quick rundown to keep in mind:
- Ensure dough is at room temperature.
- Start with gentle fingertip pressing.
- Use gravity and knuckle support for stretching.
- Let dough rest whenever it resists.
- Avoid rolling pins and forceful pulling.
- Be patient – it’s worth it!
Conclusion
You’ve learned that stretching pizza dough without tearing is all about patience and gentleness. We found that understanding your dough’s temperature and giving it time to rest are key. By using the fingertip press and gravity-assisted methods, you can coax your dough into shape. Remember to avoid forceful pulling and rolling pins. Your next pizza night is set for success. Now, go forth and stretch with confidence!
Frequently Asked Questions
What if my pizza dough keeps shrinking back?
This means the gluten is still too tight. You need to let it rest more. Cover the dough and give it another 10-15 minutes, or even longer if needed. We found that repeated short rests are more effective than trying to force it.
Can I use a rolling pin on my pizza dough at all?
While it might seem easier, we strongly advise against using a rolling pin. Research shows it crushes the airy structure of the dough, leading to a dense crust and making it more prone to tearing during stretching.
My dough is sticking to my hands and counter. What should I do?
A little sticking is normal, but too much means you need a touch more flour. Lightly dust your hands and the surface, but don’t overdo it. We found that slightly cooler dough can sometimes be less sticky and easier to manage.
What’s the best way to repair a small tear in the dough?
Don’t panic if you see a small tear! Gently pinch the edges of the tear together and smooth it out with your fingertips. You can often work small tears into the outer crust where they won’t be noticeable after baking.
How long should I let my pizza dough rest at room temperature before stretching?
We found that letting your dough come to room temperature for about an hour to two hours is ideal. Cold dough is stiff and will resist stretching, leading to tears. Warm dough is much more cooperative.
