
What Is the Safest Way to Proof Pizza Dough Overnight?

The safest way to proof pizza dough overnight involves proper refrigeration and ensuring your dough is properly covered to prevent drying. You want to slow down the yeast’s activity, not stop it completely. This method ensures a delicious, flavorful crust for your homemade pizza without any guesswork. We found this approach yields the best texture and taste.
When you proof pizza dough in the refrigerator, you’re essentially giving the yeast a slow, cold fermentation. This develops deeper flavors and makes the dough easier to handle. Many bakers swear by this method for achieving that perfect pizza base. It’s a fantastic way to plan ahead for pizza night and get consistently great results. Don’t worry, it’s simpler than you might think!
- Slow, cold fermentation develops flavor.
- Refrigeration prevents dough from over-proofing.
- Proper covering is key to avoid dryness.
- Overnight proofing makes dough easier to manage.
Let’s walk through exactly how to get your pizza dough ready for a perfect overnight proof.
“`html
Safely Proofing Pizza Dough Overnight
The safest way to proof pizza dough overnight is by using controlled refrigeration. This method slows down the yeast’s activity without killing it. It allows for a slow, cold fermentation process. This process develops deeper flavors in your dough. It also makes the dough much easier to handle later. You’re essentially giving your dough a spa treatment in the fridge. This ensures a delicious, airy crust for your homemade pizza.
Why Cold Proofing is Your Best Friend
Cold proofing, or retarding the dough in the refrigerator, is a baker’s secret weapon. It’s a fantastic way to plan ahead for pizza night. You can make your dough days in advance. This allows busy weeknights to become much easier. The slow fermentation breaks down the starches. This results in a more digestible crust. It also creates complex flavors that you just can’t get with a quick rise.
The Science Behind Slow Fermentation
Yeast are living organisms. They consume sugars and produce carbon dioxide gas. This gas is what makes your dough rise and become airy. In a warm environment, yeast are very active. They work quickly to expand the dough. When you move the dough to a cold refrigerator, their activity slows dramatically. They don’t stop completely, but they work at a much more leisurely pace. This slow, steady work develops better flavor compounds. It’s like a slow-cooked meal versus fast food for your dough.
Benefits of Overnight Cold Proofing
- Enhanced Flavor: The long, cold fermentation creates more complex and delicious tastes.
- Improved Texture: The dough develops a better structure, leading to a chewier, crispier crust.
- Easier Handling: Cold dough is firmer and less sticky. This makes it easier to shape and stretch.
- Flexibility: You can proof your dough for 24, 48, or even 72 hours. This fits your schedule perfectly.
- Digestibility: Some research suggests that longer fermentation can make bread easier to digest (NCBI).
Getting Your Dough Ready for the Fridge
The most important step is preparing your dough to survive its cold slumber. Think of it like tucking a baby into bed. You want to make sure it’s comfortable and protected. This means proper covering is absolutely essential. Without it, your dough can dry out and form a tough, leathery skin. This skin will hinder its rise and negatively impact the final texture of your pizza crust.
Choosing the Right Container
The container you use matters. It needs to be large enough for the dough to potentially double in size. You don’t want it to feel cramped. A bowl or a plastic food container works well. Ensure it has a lid or can be tightly sealed. If you’re using a bowl, plastic wrap is your best friend.
Using a Bowl and Plastic Wrap
If you opt for a bowl, make sure it’s lightly oiled. This prevents the dough from sticking. Then, cover the bowl tightly with plastic wrap. You want to create a seal that traps moisture. Go around the rim of the bowl a couple of times. This prevents air from getting in and drying out your precious dough. Some bakers even double-wrap just to be safe. It’s better to be a little overzealous with the wrap than to end up with dry dough.
Using a Dough Box or Container with a Lid
Dough boxes are great for larger batches. Food-grade plastic containers with airtight lids are also excellent. Lightly oil the inside of the container. Place your dough ball inside. Make sure there’s room for expansion. Then, snap the lid on tight. This is often the easiest method. It requires less fuss than plastic wrap. Plus, it’s reusable and a bit more eco-friendly.
How Much Oil Should You Use?
A little oil goes a long way. You only need a very thin coating. Just enough to prevent the dough from sticking. Too much oil can make the dough greasy. It can also interfere with the gluten development. A tablespoon or two of olive oil or vegetable oil is usually sufficient for a standard batch of dough. Rub it around the bowl or container with your fingers or a paper towel.
The Refrigeration Process Itself
Now comes the waiting game. Place your covered dough into the refrigerator. The ideal temperature for cold proofing is between 35°F and 40°F (1.7°C to 4.4°C). Most home refrigerators are set within this range. Avoid placing the dough in the coldest part of the fridge, like near the freezer vent. This could potentially freeze your dough, which is not what you want.
Where to Put Your Dough in the Fridge
The door shelves can sometimes fluctuate in temperature. It’s best to place your dough on a middle or lower shelf. This offers a more consistent and cooler environment. If you have a drafty spot, steer clear. You want a gentle, steady cold. Think of it as a cool, quiet room for your dough to rest and mature.
How Long Can Dough Stay in the Fridge?
You can safely proof pizza dough in the refrigerator for 24 to 72 hours. Many bakers find that 48 hours offers a fantastic balance of flavor development and ease of use. The longer it proofs, the more complex the flavor becomes. However, after 72 hours, the dough can start to degrade. The gluten structure may weaken too much. This can make it difficult to work with and affect the final crust quality.
A common timeframe many experts recommend is 24-48 hours. We found that this range typically yields the best results. It allows ample time for flavor development without risking the dough’s integrity. You’ll notice the dough becomes more golden in color. It will also smell wonderfully tangy.
Checking Your Dough’s Progress
You don’t need to constantly check on your dough. Once it’s covered and in the fridge, let it be. Resist the urge to peek too often. Every time you open the fridge, you change the temperature. This can disrupt the slow fermentation process. Trust the process and the cold. Your dough is working its magic in there.
Signs of Properly Cold-Proofed Dough
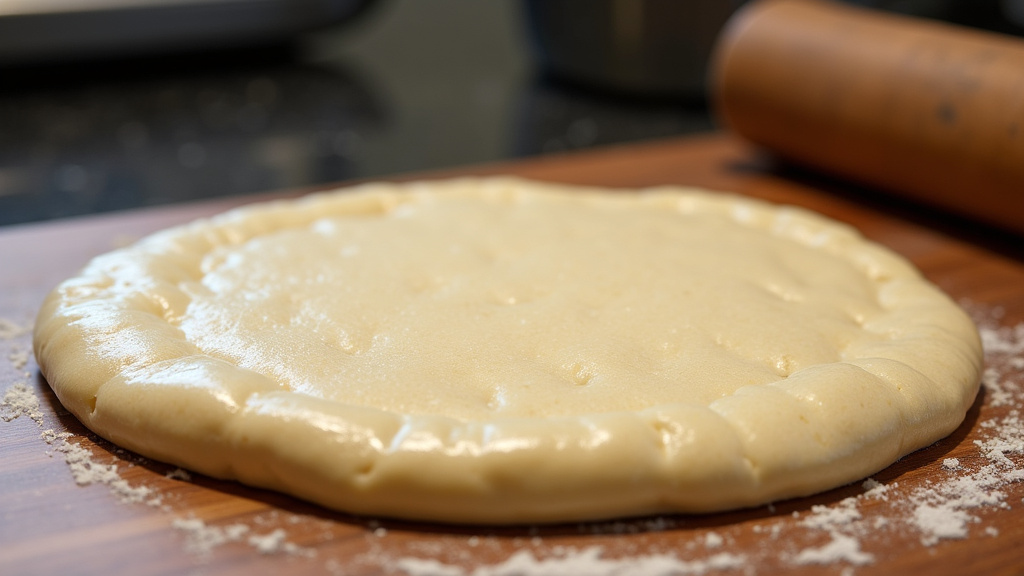
When you’re ready to bake, take your dough out. It should look slightly puffed up. It won’t have doubled in size like a warm proof. That’s normal for cold fermentation. The surface might have a few small bubbles. When you gently poke it, the indentation should slowly spring back. If it springs back immediately, it might need a little more time. If it stays indented, it might be slightly over-proofed, but usually still usable.
Taking Your Dough Out to Bake
About 1-2 hours before you plan to shape and bake, take the dough out of the refrigerator. Let it sit at room temperature. This allows the dough to warm up slightly. It will become more pliable and easier to stretch. This tempering period is crucial. Trying to stretch cold, stiff dough can lead to tearing.
The Tempering Process Explained
Remove the dough from its container. Place it on a lightly floured surface. You can cover it loosely with plastic wrap or a clean kitchen towel. This prevents the surface from drying out as it warms. The goal is to let it relax and become supple again. The exact time needed depends on your room temperature. On a warm day, an hour might be enough. On a cooler day, two hours might be better. You’re looking for that perfect balance of cool but manageable.
Here’s a quick checklist to make sure you’re on the right track:
- Use a lightly oiled bowl or container.
- Cover dough tightly to prevent drying.
- Place dough on a middle or lower fridge shelf.
- Allow 24-72 hours for proofing.
- Temper dough at room temp for 1-2 hours before shaping.
“`
Conclusion
You’ve learned that the safest and most effective way to proof pizza dough overnight is through controlled refrigeration. This slow, cold fermentation process is your secret weapon for developing amazing flavor and achieving a superior crust texture. By properly covering your dough and allowing it to rest in the fridge for 24-72 hours, you’re setting yourself up for pizza perfection. So go ahead, prep your dough tonight, and look forward to an effortless and delicious homemade pizza experience tomorrow!
Frequently Asked Questions
Can I proof my pizza dough at room temperature overnight?
Proofing pizza dough at room temperature overnight is generally not recommended for safety and quality. The dough can over-proof, leading to a flat crust and yeasty flavor. It also increases the risk of bacterial growth compared to controlled refrigeration.
What happens if my pizza dough dries out in the fridge?
If your pizza dough dries out, it will form a tough, leathery skin. This skin prevents the dough from rising properly and can result in a dense, chewy crust. Always ensure your dough is tightly covered to maintain moisture.
Is it safe to leave pizza dough in the fridge for more than 72 hours?
While some doughs can be left in the fridge for longer, it’s generally best to limit cold proofing to 72 hours. After this point, the gluten structure can start to break down, making the dough difficult to handle and potentially affecting the final texture of your pizza.
Do I need to oil my pizza dough before refrigerating?
Yes, a light coating of oil is recommended before refrigerating. This prevents the dough from sticking to the container and helps protect its surface from drying out, ensuring a better texture.
Will my pizza dough double in size when cold-proofing?
No, your pizza dough will not typically double in size during a cold proof. You’ll notice some puffiness and a slight increase in volume, but the dramatic rise seen in warm proofing won’t occur. The main benefits here are flavor development and easier handling.
